Top #7 Must Haves in Your Bread Machine Kitchen
The most basic principle for me in baking is FOLLOWING a recipe… to the T. Make sure you get the result you want. If you FOLLOW A RECIPE you will almost always get the same results. I say ALMOST always because small differences in baking can make a big difference in your results.
I know how small variations/changes to a recipe can make big differences (not always positive) and because I want you to be able to get the same results I get, I’m listing all the ingredients for recipes and the tools and accessories I use in our kitchen. If you see a recipe on this site and you want to see the SAME results in your Kitchen, I suggest you use the same recipe, ingredients, and equipment. So, I’m going to list the top 7 pieces of equipment that I ACTUALLY own and use to get my results on this page. Sidenote: You’ll also find specific equipment on each recipe page.
#1 Accurate Digital Kitchen Scale
I think the #1 piece of equipment that will make or break your loaf of homemade bread is quality Digital Scale to measure ingredients. Particularly your flour, if you follow some recipes that use volumes(cups) instead of mass(grams) those small variations/changes I mentioned before can have kill your recipe. we’ve had so many bad loaves of homemade bread that just don’t come out right, and it usually came down to not measuring the flour correctly. The consistency can vary a lot depending on the type of flour you use and how compact it gets in your scoop, so NOW I always weigh just about everything that goes into the bread machine which might SEEM like over kill, but it will save you a bunch of time and wasted ingredients. If you don’t have one, do yourself a favor and get a GOOD KITCHEN SCALE. Trust me. They’re pretty inexpensive, I bought this one back in 2018 and it’s still working for me. A good quality kitchen scale will make it so easy to add the right amount of ingredients especially when you use the TARE function, you can just throw your baking pan on the scale, TARE it out and dump your flour in until you have the exact right amount for the recipe, its actually faster than scooping out measuring cups and scraping off the excess from the top of the cup.

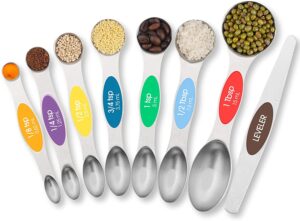
#2 Measuring Spoons
For the smaller ingredients, I suggest you get some of these. It can be hard to get tiny weights for smaller recipes and weighing our liquids like vanilla extract with a digital scale can be tricky. I recently bought these Colorful Two Sided Nesting Measuring Spoons that are really cool, each one has a little magnet inside so they stick together and don’t get all jumbled up. If you’re a neat freak like me this is so nice because I can use just one at a time to measure like a table spoon of oil and then set that aside while using the teaspoon for lets say vanilla extra and I don’t get oil all over my hand like the old spoons I had which were on all linked together on a key ring. Bonus feature of the magnetic handle is you can hang these on a metal bowl or container. I also like that they are flat on the bottom so you can sit them flat on the counter.
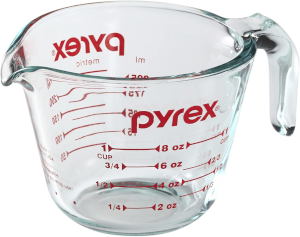
#3 Liquid Measuring Glass
You’re going to need to measure liquids like water and milk, most of my recipes are in mL so one with those measurements is must. You can use a digital scale to measure out liquids like water and milk, but the weights will vary based on the type of liquid like almond milk vs whole milk vs 2%. I just prefer to measure these out in a glass. I use this Pyrex Prepware Measuring Cup . It’s great because it’s so sturdy, has a nice handle and you can bake/microwave it without a problem. Nice if you want to melt butter or coconut oil really quick in the microwave and not worry about spilling or burning your hand grabbing a little bowl.
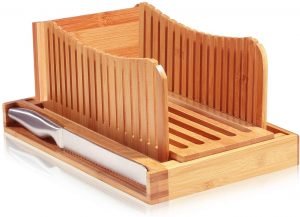
#4 Bread Slicer
Ok, this is pretty basic but cutting even slices of bread is harder than it looks, especially with a freshly baked loaf of bread. I love this Bamboo Bread Slicer I got because it makes evenly slicing your bread super easy and catches all the crumbs so you don’t have a mess on your counter. I also like that it comes with a nice solid bread knife and a little magnet that holds it in place tucked away safely on the side(I keep mine on the back so it doesn’t really show) AND it folds up nice and neat so it doesn’t take up much room in the cupboard if you don’t want it out on the counter.
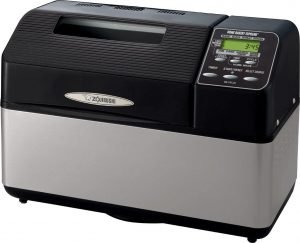
#5 Bread Machine
Ok, this is obvious but I said I was going to list the things you’ll need. I bought this Zojirushi BB-CEC20 Home Bakery Supreme back in 2020 and it’s still going strong and has cooked the majority of loaves you see on this site. We love this thing. It’s high quality and you can tell it’s built to last, it just feels sturdy, unlike the other bread machines we’ve used. So many different options and custom settings it’s ridiculous, I didn’t think it was going to be much better than the previous bread makers we had when I bought it, but I was so wrong and I’m glad we have it!
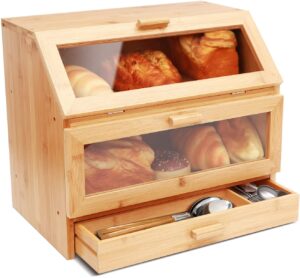
#6 Bread Box
Our favorite aspect of homemade bread is that we know exactly what is in it and that there are no weird preservatives added that let it sit on the shelf in the store for weeks on end. If you’re like us you are going to be baking a lot of fresh bread in your bread machine and you will quickly find out that homemade bread will actually go stale pretty fast. Get yourself one of these fancy old school countertop bread boxes to keep your bread fresh. We got this Bamboo Bread Box on Amazon and loved that it actually matches our cabinets.
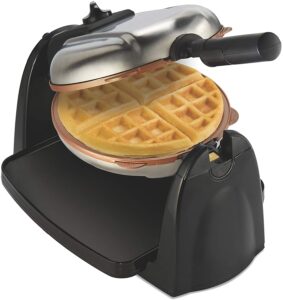
#7 Belgian Waffle Iron
Ok, this isn’t REALLY a must, but I love waffles and one of my favorite things to make in the bread machine is Belgian Liege Waffles, which you make with dough instead of batter and you really need a waffle iron that you can squish the dough down with and one that has deep pockets like this Hamilton Beach Belgian Waffle Maker. The handle and flip function are good to squish the bready waffle down and keep the pressure on. The removable plate will come in handy when it comes time to clean up, because the pearl sugar in the waffles will caramelize and it can be a real pain to get that off the iron without submerging the whole thing in water.